Azure Web Apps is a great place to host web creations. Apps even come with a free SSL cert for users without a custom domain.
That said, it is highly recommend anyone serious about building a web app for their business create a custom domain (and obtain an SSL Cert).
This blog post will show you step by step how to obtain a free SSL cert using Let’s Encrypt and upload it to the Azure Web App (Since you are reading this post I assume you already have a custom domain name configured and the website is deployed to an Azure Web app).
Let’s Encrypt
Let’s Encrypt is a new Certificate Authority enabling users to create free SSL Certificates to secure web applications. While it’s possible to get SSL certs from other CA authorities relatively cheap, you can pay up to $100-$200 a year. This could be a significant expense for a new startup.
Let’s encrypt is still in beta and only has tooling available for Apache/NGINX running on Linux. This makes it a little more difficult to get an SSL Cert for IIS that will run inside the Azure Web App.
But, not impossible 🙂
Follow the steps shown below and you will have an SSL Cert up and running in no time.
Creating a Temporary Linux VM
Let’s Encrypt allows users to generate a certificate on any box and quickly transfer it to a Azure Web App.
So, we are going to do just that and create a Linux VM inside of Microsoft Azure that we can use to generate a certificate and then when we are all done we will destroy the machine so that we are only charged for the few minutes that we actually used the machine. NOTE: If you already have a Linux box you can skip this step.
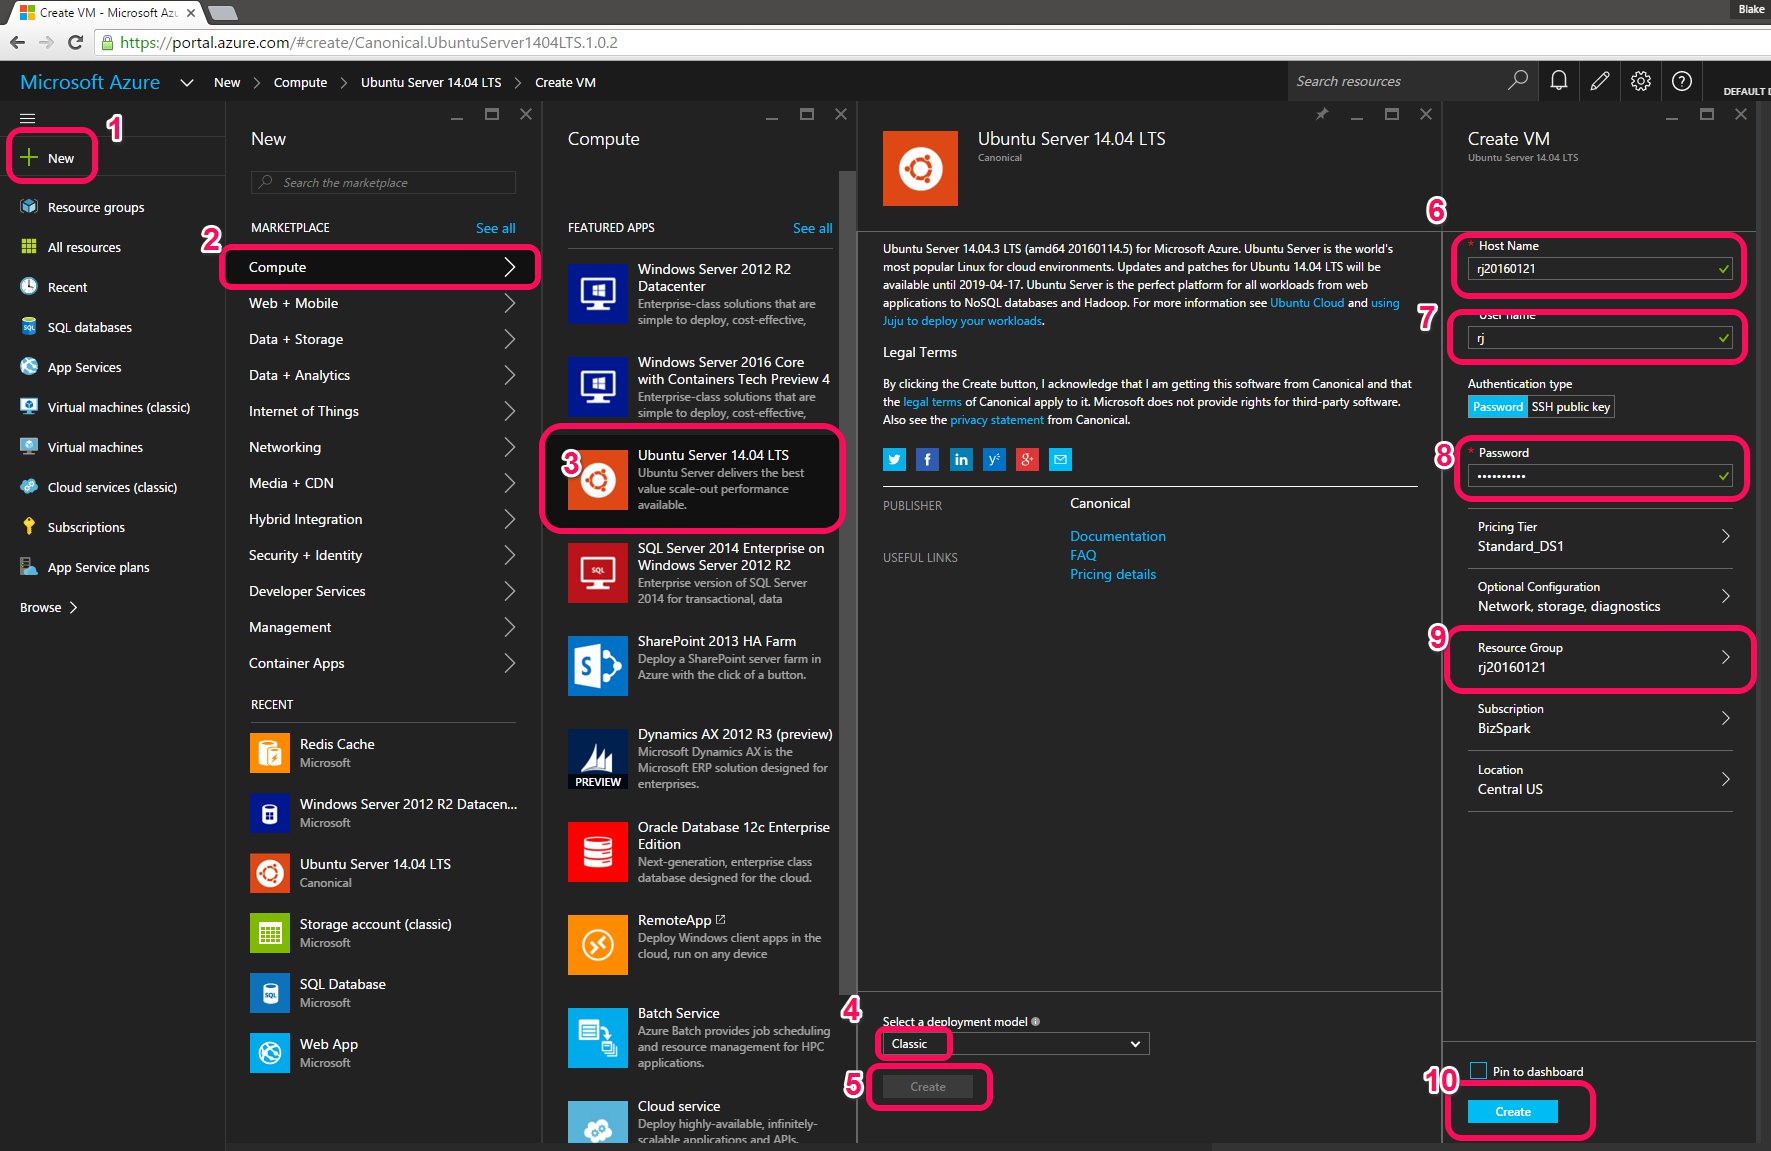
1. Inside of the Azure Portal Press the ‘New’ button
2. Select ‘Compute’
3. Select ‘Ubuntu Server 14.04 LTS’
4. Select the ‘Classic’ deployment model
5. Click ‘Create’
6. Type in a unique VM host name
7. Type a username
8. Enter a password
9. Create a new resource group only this VM lives in so it’s easy to delete.
10. Hit ‘Create’
After several minutes a new Linux VM will be live. You’ll ssh into the VM to generate the SSL Cert.
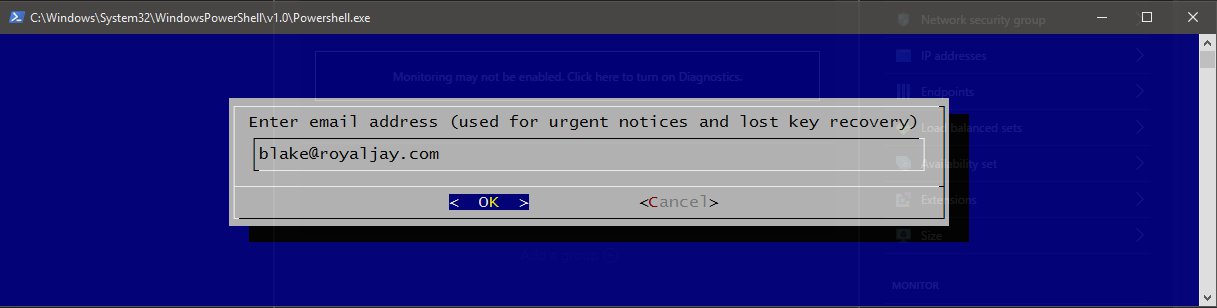
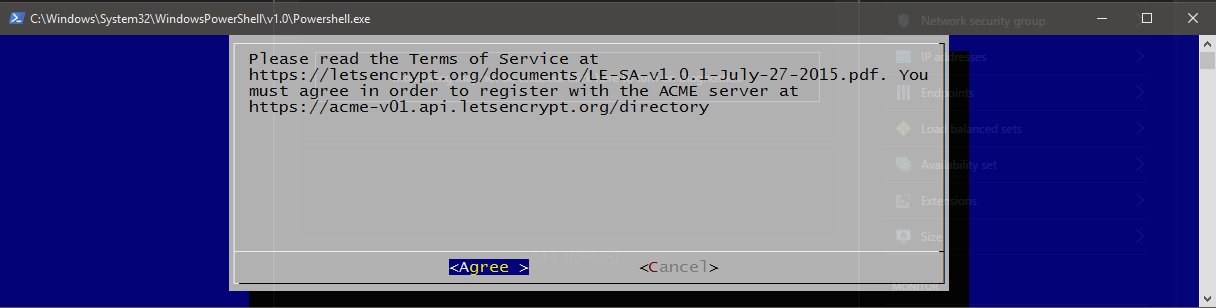
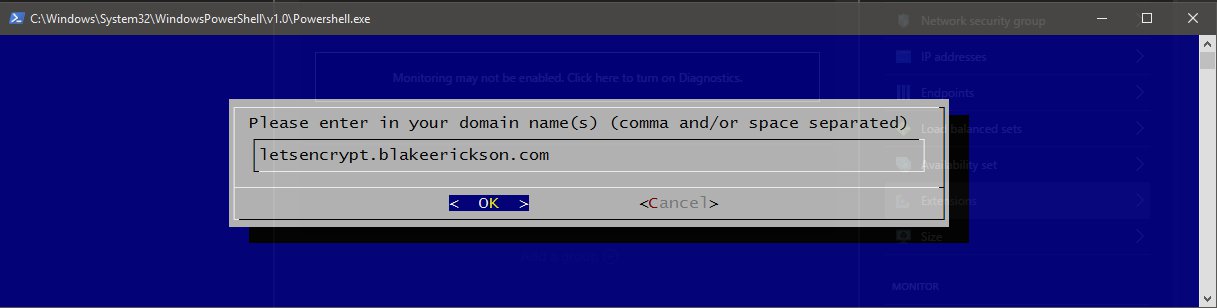
Once you have SSH’d into the Linux VM, type the following commands to generate the certificate:
sudo apt-get install git
git clone https://github.com/letsencrypt/letsencrypt
cd letsencrypt
./letsencrypt-auto certonly --manual
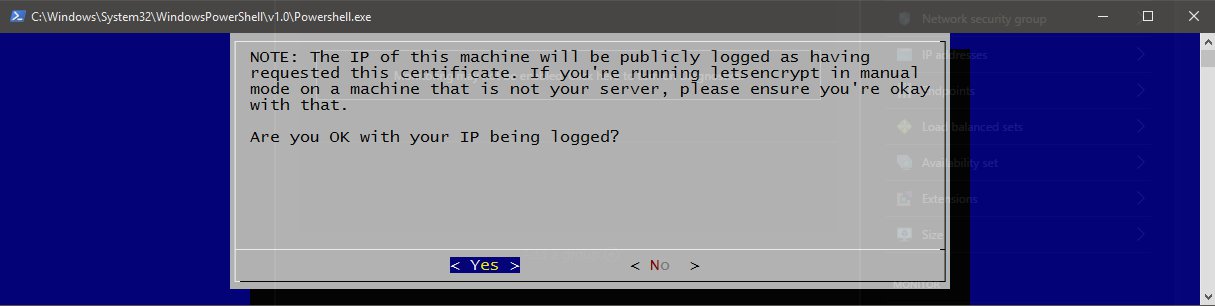
Some blue screens will pop up. Enter the required information:
Next, a URL will be generated which you will create a route for in the Azure Web App. It will look something like this:
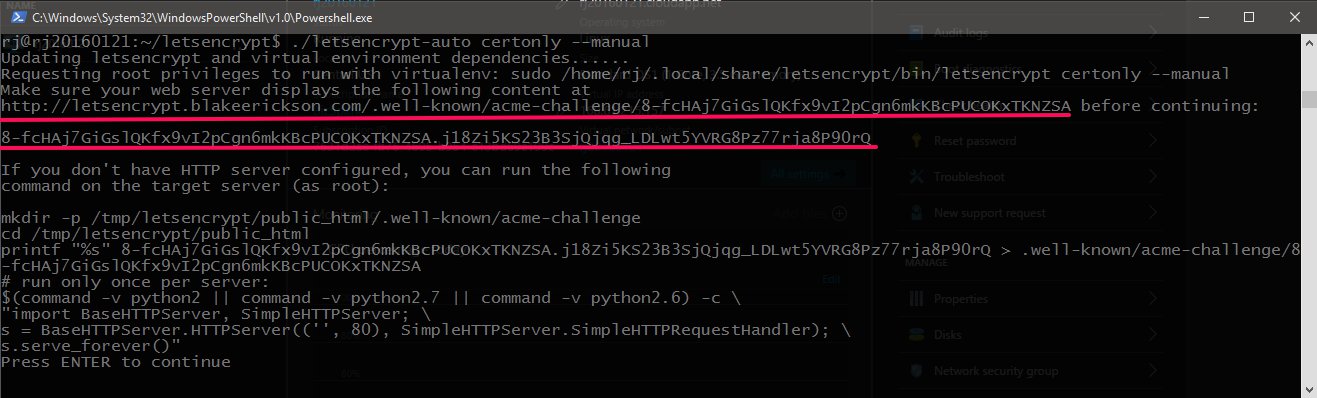
Adding a route to the web app
Inside Visual Studio,, create a new controller called LetsEncryptController.cs with the following code:
using System.Net.Http;
using System.Net.Http.Headers;
using System.Web.Http;

namespace LetsEncrypt.Controllers
{
    public class LetsEncryptController : ApiController
    {
        [HttpGet]
        [Route(".well-known/acme-challenge/6GZFVo5tG95Y6GuishY6DJbJYhfB0Ewoidn3RI-RjWU")]
        public HttpResponseMessage Verify()
        {
            var response = Request.CreateResponse();
            response.Content = new StringContent("6GZFVo5tG95Y6GuishY6DJbJYhfB0Ewoidn3RI-RjWU.j18Zi5KS23B3SjQjqg_LDLwt5YVRG8Pz77rja8P90rQ");
            response.Content.Headers.ContentType = new MediaTypeHeaderValue("text/plain");

            return response;
        }
    }
}
This will generate a new route and return a plain text response.
Change the ‘url’ and ‘response’ to the values provided by your Linux shell.
After the route has been created, re-deploy the app to Azure.
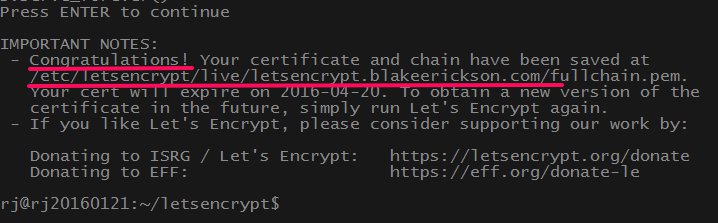
Once the deployment is complete, go back to the Linux terminal and press enter. This will trigger a verification message that you own the domain and are authorized to create an SSL cert for it.
The confirmation should look like this:
Converting the cert to a .pfx file
The next step is to convert the certificate file into a .pfx file to upload into Azure.
Inside the Linux shell type the following commands:
sudo -s
cd /etc/letsencrypt/live/yourdomain.com/
ls
openssl pkcs12 -export -out cert.pfx -inkey privkey.pem -in cert.pem
cp cert.pfx /home/rj
Uploading to Azure
The next step is to upload the file to Azure. There is probably a way to upload it with xplat-cli, but for this example we are going to copy it to the local machine and use the Azure Portal to upload it.
From the windows box open up a cmd prompt and type:
pscp.exe rj@rj20160121.cloudapp.net:/home/rj/cert.pfx d:\downloads\cert.pfx
This will copy the file from the Linux VM to your local computer. You may need to install PSCP first.
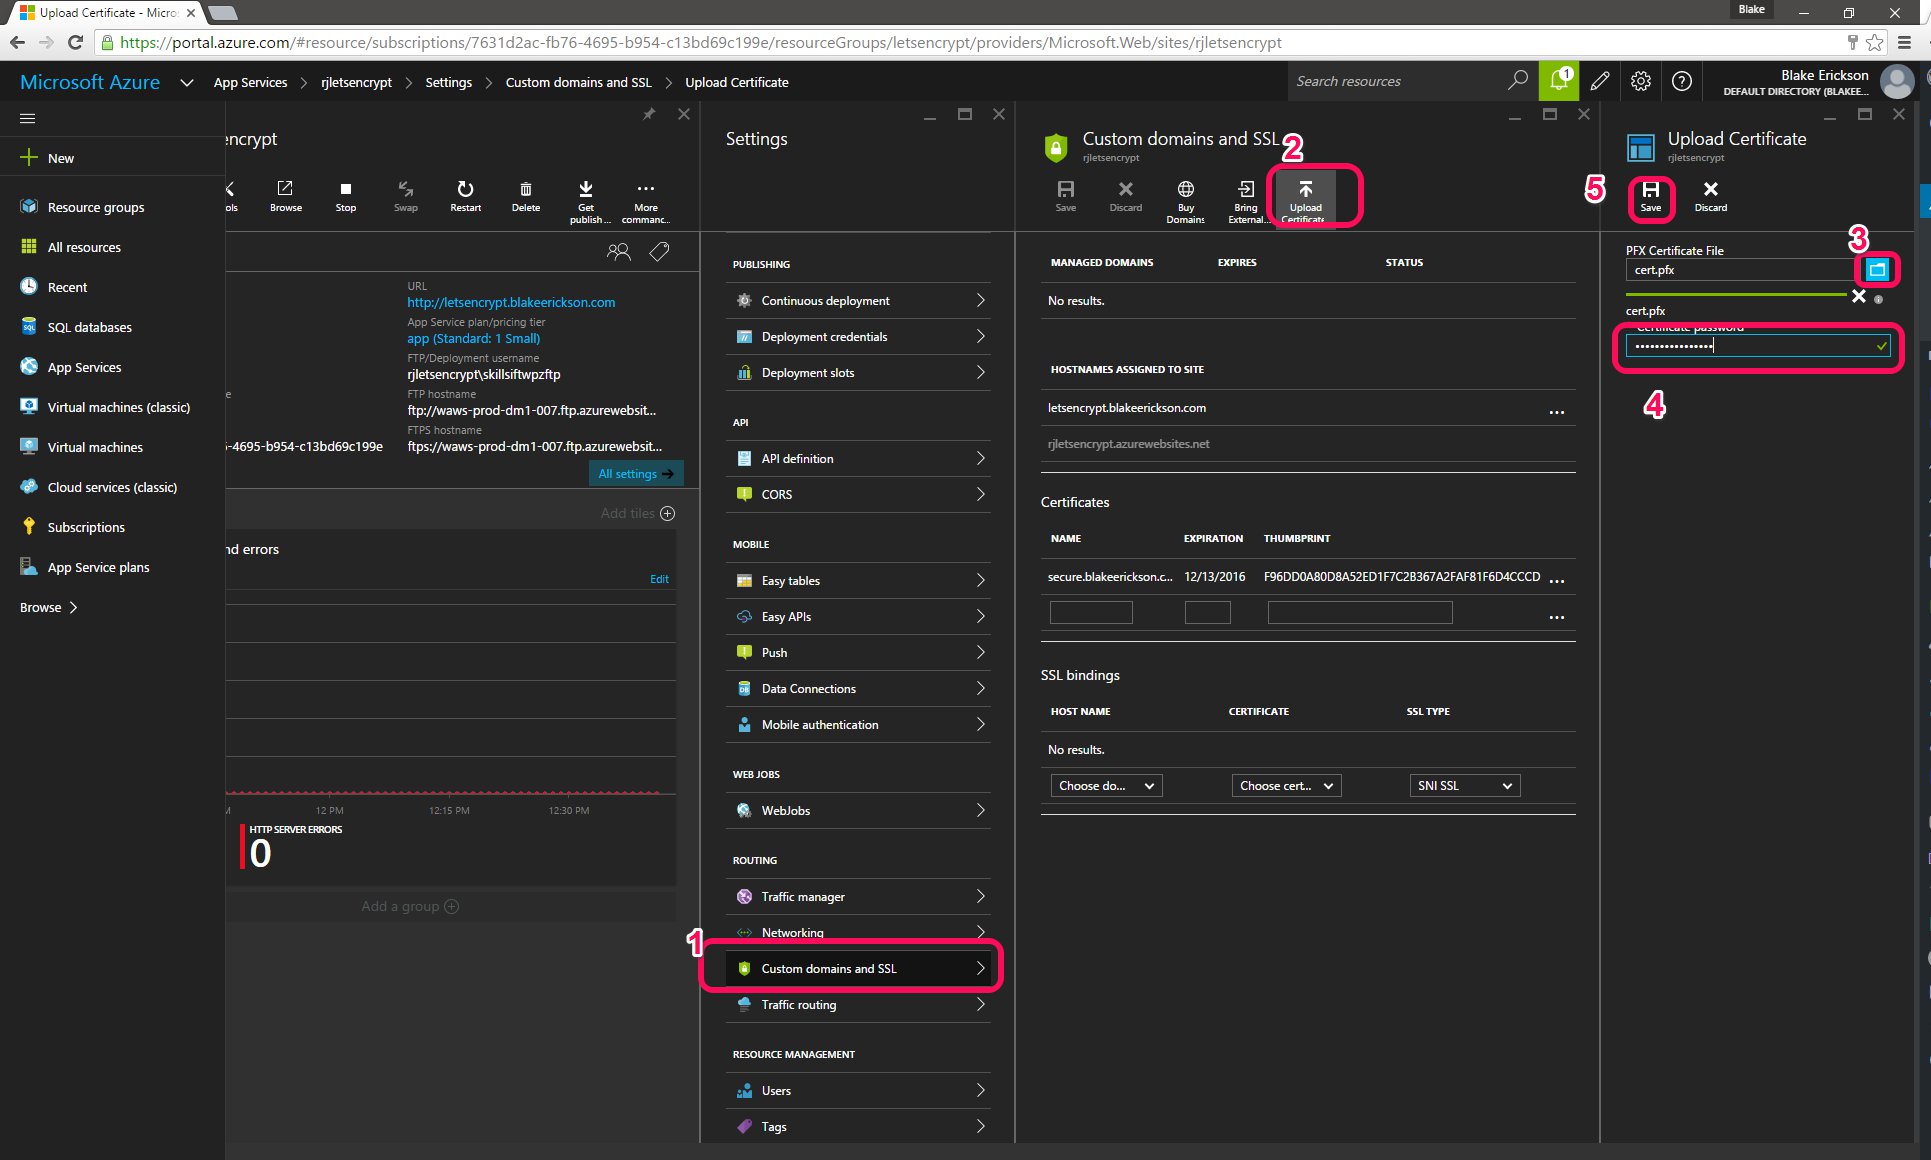
Head back over to the Azure Portal and browse to your web app:
1. Click on ‘Custom domains and SSL’
2. Select ‘Upload Certificate’
3. Find the certificate on your local machine
4. Enter in the certificate password
5. Click ‘Save’
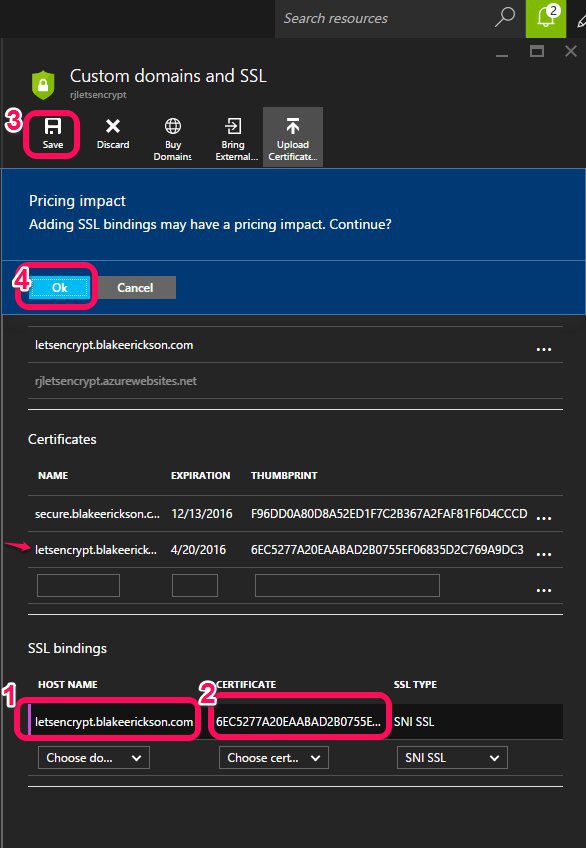
Back on the ‘Custom Domains and SSL’ page, the Certificate should show up in the certificates list.
The next step is to create a binding for it by following these steps:
1. Choose the host name from the dropdown
2. Select the certificate
3. Press ‘Save’
4. Press ‘Ok’ on the Pricing Impact confirmation
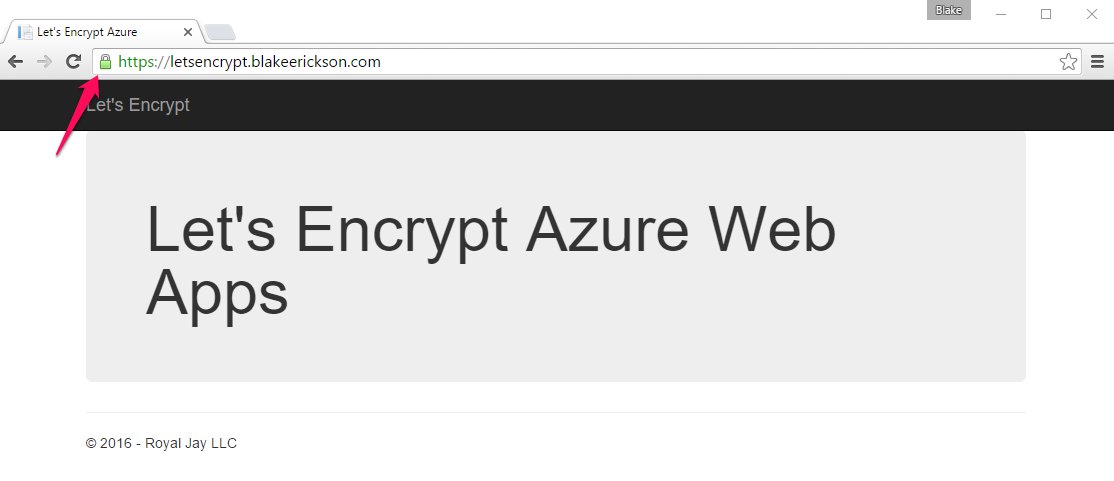
Browse to the new https domain and confirm that it is secure:
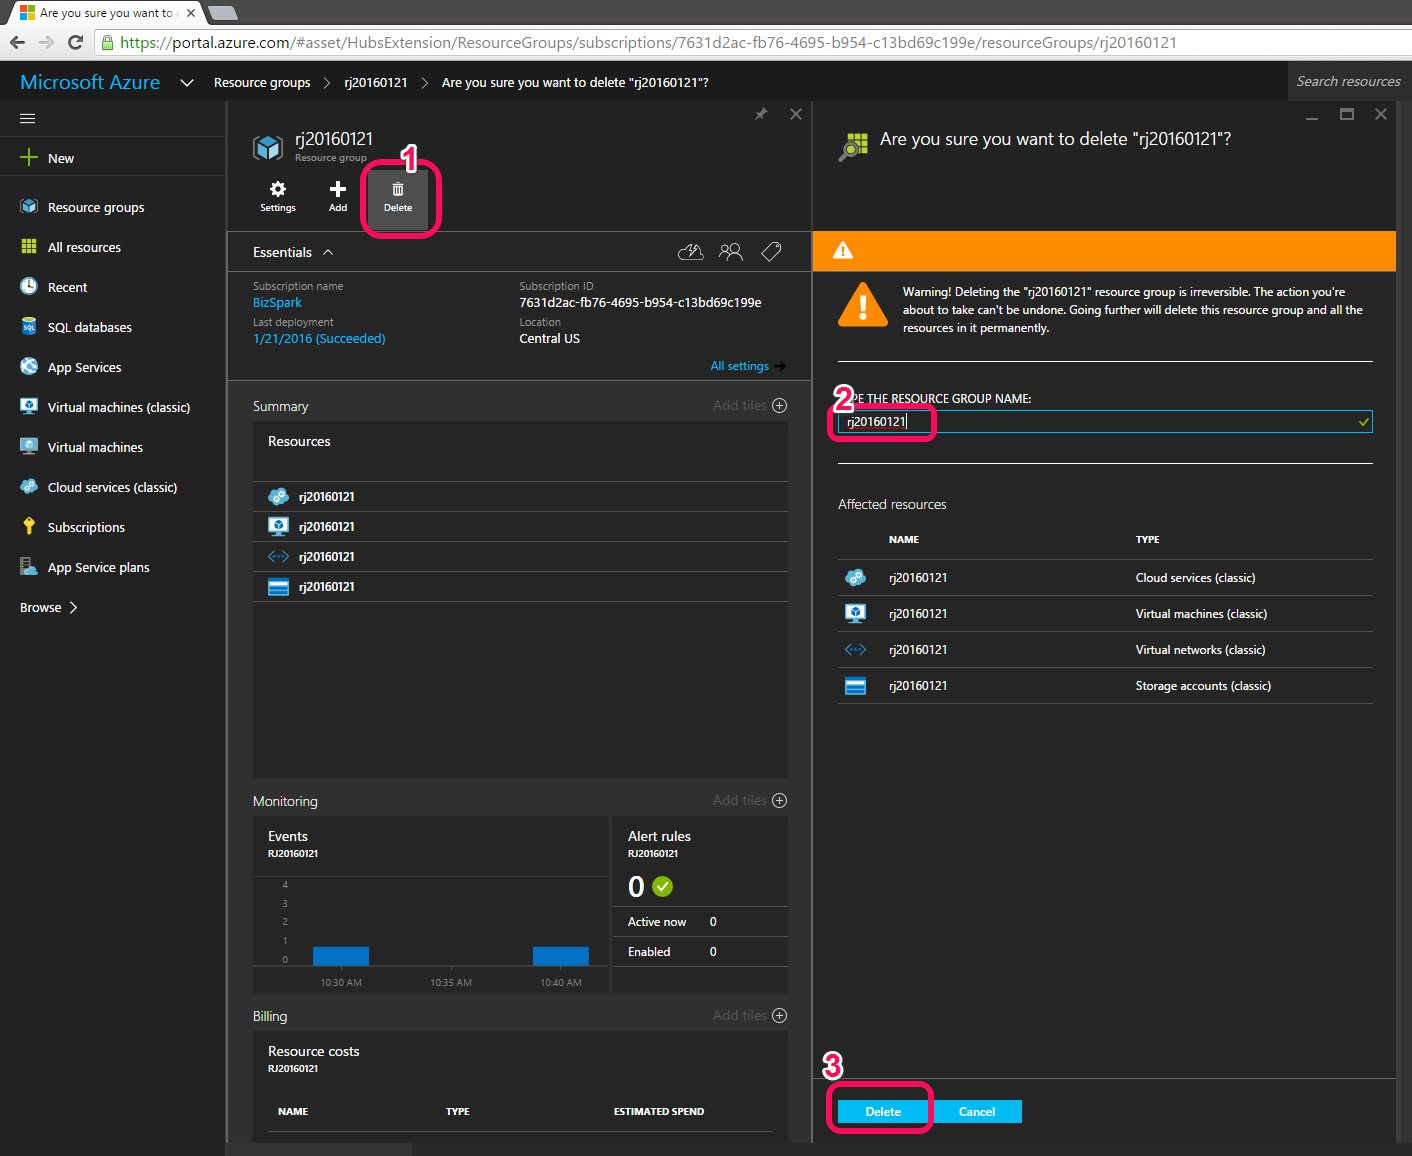
Delete the Linux VM by browsing to the Resource Groups section inside the Azure Portal and remove the Resource Group you created for the VM:
Let’s Encrypt is still young and this process for generating an SSL Certificate on Windows for IIS will improve. Here are some additional links showing progress toward this goal:
– ACME client for Windows/IIS
– ACMESharp
– Let’s Encrypt for Windows IIS
– How To: Get LetsEncrypt working with IIS manually