
One of the coolest technologies taking flight recently is Voice Activation. With Siri, Google Now and Cortana, talking to a device instead of manually typing commands is becoming common place.
While many users are leveraging voice technology for search, location mapping and other day-to-day online activities…
Why not take things a step further?
Build your very own Siri
.
Use the technology to automate repetitive work tasks like monitoring deployment and build servers.
Send out verbal warnings when there are development issues.
And teach your computer to screech like an eagle in a funny English accent.
How?
Meet Jasper.
What is Jasper?
Jasper is an open source project that allows you to use voice commands to execute certain tasks. People have used it to build everything from home automation systems to network monitoring tools.
Why?
Recently, our team has been working on a server build process for one of our projects, which our Architect has lovingly dubbed “Project Freedom Eagle.” As an in-office joke, whenever someone utters the words “Freedom Eagle,” another person in the office will respond with “Kaw-Kaw.”
In part 1 of this post, we will be installing Jasper on the Raspberry Pi2 and writing our first simple Jasper module (we are going to make Jasper say “KawKaw”.) In part 2, we’ll make it a little more useful and pull up build events from our Octopus Deploy server.
Hardware Required
To start, you will need a Raspberry Pi2. I recommend buying a kit, which has everything we need except speakers and a microphone. The kit I am using can be found here. I am also using the recommended microphone from the Raspberry Pi2 page that can be found here. Finally, you will need a pair of powered speakers (or headphones.)
Installing Jasper
I won’t go into details on installing Jasper onto the Raspberry Pi2. Instructions can be found on the Jasper Github page here. However, I will say getting Jasper to work was really tricky. If you would like to skip the process, an sd-card .img file with jasper pre-loaded can be found here (credit goes to Dan Sinclair who graciously supplied the .img file to the community.) I would recommend using the .img file as the documentation on Jasper’s page has not been updated for the Raspberry Pi2.
Configuring Jasper
After burning the above .img file to an SD-card you’ll need to login and configure jasper. By default the login and password for Raspbian is pi/raspberry. On startup you will be dropped to the linux command prompt. Login with the above credentials and type the following:
sudo raspi-configThis will bring up the Raspberry Pi configuration screen. Set your internationalization settings and save.
More information on raspi-config can be found here.
At this point, you can launch the desktop by typing:
startxOr you can dive right into the Jasper setup by typing the following text into terminal:
cd ~/jasper/client
python populate.py
Follow the commands on the screen to populate your Jasper profile. You will be prompted for gmail and phone information. Jasper uses this information to send news stories to you when prompted.
The following is from the Jasper configuration guide.
Important: populate.py will request your Gmail password. Of course, this is purely optional and will never leave the device. This password allows Jasper to report on incoming emails and send you text or email notifications, but be aware that the password will be stored as plaintext in profile.yml. The Gmail address can be entered alone (without a password) and will be used to send you notifications if you configure a Mailgun account.
Changing Jaspers Voice
Out of the box Jasper sounds like a drunk Stephan Hawking, so let’s change his voice to something a little more personable.
Install SVOX Pico
(The following is adapted from http://rpihome.blogspot.com/2015/02/installing-pico-tts.html)
Pico is a text to speech program. Unlike some of the other TTS programs, this one does not require an internet connection and has very good quality.
To install it, pull down the source code and compile:
1.) In terminal, type:
sudo vim /etc/apt/sources.listAnd make sure these two lines are not commented (commented lines start with a # character):
deb http://mirrordirector.raspbian.org/raspbian/ wheezy main contrib non-free rpi
deb-src http://mirror.ox.ac.uk/sites/archive.raspbian.org/archive/raspbian/ wheezy main contrib non-free rpi
If they are missing or commented, add them and save the file.
2.) We need to update our packages, so in terminal type:
sudo apt-get update3.) Install the following dependencies:
sudo apt-get install fakeroot debhelper automake autoconf libtool help2man libpopt-dev hardening-wrapperNext, you’ll need to create a place to put the sources, again in terminal, type:
mkdir pico_build
cd pico_build
apt-get source libttspico-utils
4.) After downloading the source files there will be a new directory similar to svox-1.0+git20110131 (the number at the end is a date stamp and may be different than at the time of this blog post.)
Navigate to it by typing:
cd svox-1.0+git201101315.) Compile the source. This can take up to 20 minutes.
In Terminal, type:
dpkg-buildpackage -rfakeroot -us -ucThere should now be four .deb packages in your pico_build folder.
In terminal type:
cd ~/pico_build/The following packages should be showing:
- libttspico0_1.0+git20110131-2_armhf.deb
- libttspico-data_1.0+git20110131-2_all.deb
- libttspico-dev_1.0+git20110131-2_armhf.deb
- libttspico-utils_1.0+git20110131-2_armhf.debsudo apt-get update
6.) Install the packages in the following order:
sudo dpkg -i libttspico-data_1.0+git20110131-2_all.deb
sudo dpkg -i libttspico0_1.0+git20110131-2_armhf.deb
sudo dpkg -i libttspico-utils_1.0+git20110131-2_armhf.deb
Reboot the Raspberry Pi by typing “reboot.”
When the Raspberry Pi restarts, you’ll be ready to run Jasper.
Introducing Jasper
To launch the Jasper application, type:
/home/pi/jasper/jasper.pyYou’ll see the Jasper application start up with an immediate wall of text:

You should notice Jasper is listening in to your conversations. Don’t worry, he’s not a gossip 🙂
Take some time to familiarize yourself with some of his built in functionality. Try saying “Hacker News” When Jasper hears this, he will use text to speech to tell you the top 5 stories.
Say “Tell me a Joke” and he will tell you a horrible knock knock joke.
Let’s take things a step further and write a Jasper module to extend the functionality.
Time to write some scripts
Jasper scripts are easy to write and install into Jasper with one caveat…
To get the scripts working correctly, you’ll need to reboot your Raspberry Pi after placing the file in the modules directory.
For the first module, we want Jasper to respond with “Kaw-Kaw” whenever we tell him “Freedom Eagle.”
Jasper will compile any python script you place in his modules directory. This directory is located at “$ /jasper/client/modules/”
A Jasper script has 3 main sections.
- A WORDS array holds the words Jasper will respond to in order to run this script
- A “handle” method contains the commands Jasper will respond with
- An “isValid” method will validate the correct words were “heard.”
Lets create our first script.
It’s easier to write Python scripts in an IDE than it is using vim, so lets type “startx” into terminal and launch the Raspbian desktop.
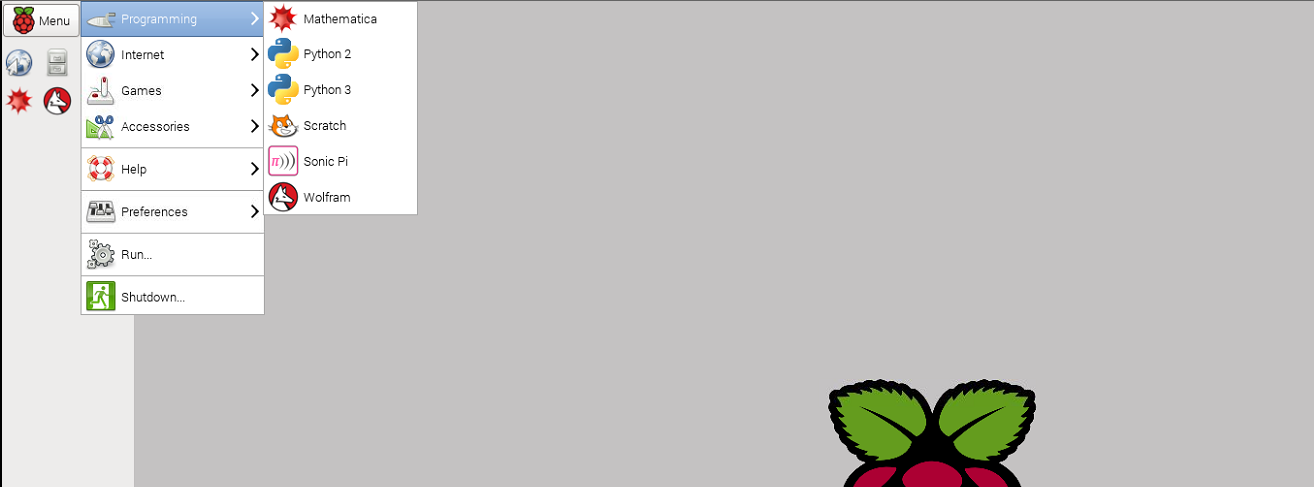
Luckily for us the Python IDE is already installed with Raspbian. You should see a screen similar to the one below.
Click on the menu and open the Python 2 Editor found under “Programming”:
Create a new script named “KawKaw.py” and save it to the “$ /jasper/client/modules/” directory:
import re
WORDS = ["FREEDOM", "EAGLE"]
def handle(text, mic, profile):
     # Responds to user-input, typically speech text, by replying Kaw-Kaw.
     # Arguments:
     # text -- user-input, typically transcribed speech
     # mic -- used to interact with the user (for both input and output)
     # profile -- contains information related to the user
     mic.say("KAW KAW")
def isValid(text):
     # Returns True if the input is related to freedom eagle.
     # Arguments
     # text -- user-input, typically transcribed speech
     return bool(re.search(r'\bfreedom eagle\b', text, re.IGNORECASE))
When Jasper hears “Freedom” or “Eagle” it will check each of the modules to see if those words match the word collection. It will then check if the text sent to the isValid method is equal to “freedom eagle,” and if so, Jasper will call the “handle” method. In this example, we just need to tell Jasper to say “Kaw-Kaw.” The command “mic.say()” will make Jasper say whatever text you pass in.
To test, restart Jasper and say “Jasper” into the microphone. At the beep, saying “Freedom Eagle” should now cause Jasper to reply with “Kaw Kaw”.
Fun stuff. Now it’s time to look at a business case.
In the next post, we’ll go more in-depth and make a series of scripts to connect to the Octopus Deploy server and retrieve events.
Jasper will automatically tell us if we have a failed deployment and email us in case of build failures.
Until the time!
Sign up for the Royal Jay newsletter and get actionable content just like this delivered straight to your inbox each week.